Hey there, pet lovers! Lisa Thompson here, your DIY pet enthusiast, ready to share some fantastic and fun projects that you and your furry friends will absolutely adore. If you're anything like me, you love spending quality time with your pets and creating things that make their tails wag and their purrs even louder. Today, I'm bringing you some pawsome DIY pet toys and accessories that are easy to make and will keep your pets entertained for hours. Let's dive in!
The T-Shirt Tug Toy
Materials Needed:
- Old T-shirt (preferably one you don't mind cutting up)
- Scissors
Instructions:
- Cut the T-Shirt: Lay your old T-shirt flat and cut it into strips about 1-2 inches wide. You’ll need at least three strips, but the more, the merrier!
- Tie the Knot: Gather the strips together and tie a tight knot at one end. This will be the base of your tug toy.
- Braid It Up: Divide the strips into three sections and braid them tightly. Once you reach the end, tie another knot to secure it.
- Tug Away: And that's it! You've got a homemade tug toy that's perfect for a game of tug-of-war with your dog.
Personal Anecdote: I remember the first time I made this tug toy for my Golden Retriever, Max. He went absolutely nuts for it! We had a blast playing in the backyard, and the best part was seeing how happy and engaged he was. Plus, it felt great to repurpose an old shirt into something fun and useful.
No-Sew Catnip Sock
Materials Needed:
- A clean sock
- Dried catnip
- Cotton balls or fabric scraps
Instructions:
- Fill the Sock: Take your clean sock and fill it with dried catnip and some cotton balls or fabric scraps. The cotton balls add a bit of bulk and texture that cats love to bat around.
- Tie It Up: Tie a knot at the open end of the sock to keep everything inside. Make sure it’s tight enough that your kitty can’t easily open it.
- Playtime!: Give the sock to your cat and watch the fun begin!
Personal Anecdote: My cat, Whiskers, is a total catnip fanatic. When I made this no-sew catnip sock, he couldn’t stop batting it around the living room. It’s his go-to toy whenever he’s in the mood for some playful pouncing.
DIY Dog Bandana
Materials Needed:
- Fabric (any color or pattern you like)
- Scissors
- Measuring tape
- Fabric glue (optional)
Instructions:
- Measure and Cut: Measure your dog’s neck to determine the size of the bandana. Cut a square piece of fabric based on that measurement.
- Fold and Cut Again: Fold the fabric in half diagonally to form a triangle. If the edges are too long, trim them to fit comfortably around your dog’s neck.
- Optional Step: If you want to ensure the edges don’t fray, you can use fabric glue along the edges.
- Tie It On: Simply tie the bandana around your dog’s neck, and they’re ready to show off their new stylish accessory!
Personal Anecdote: I made a cute polka-dot bandana for my friend's dog, Bella, and she looked absolutely adorable. We took her for a walk around the neighborhood, and she received so many compliments! It’s a simple project that adds a fun pop of style to your pet’s look.
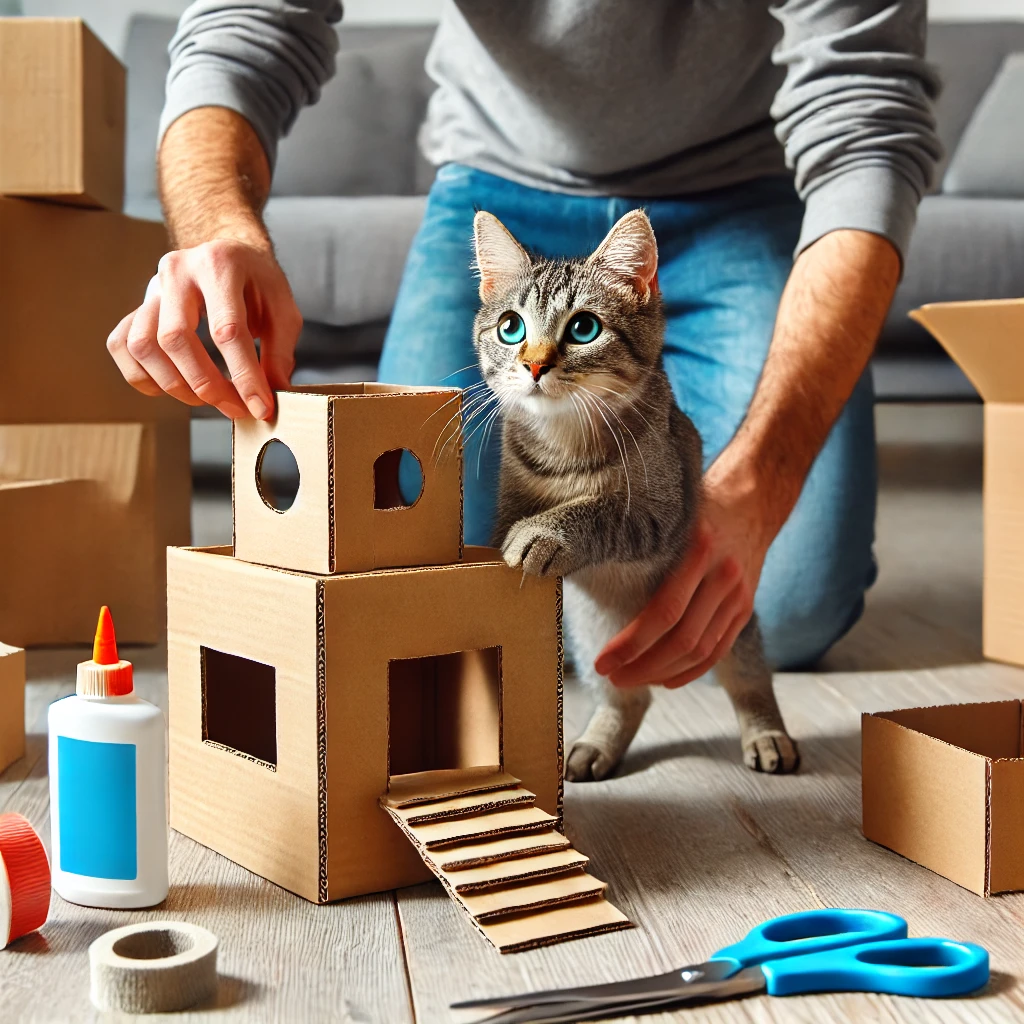
Cardboard Cat Castle
Materials Needed:
- Cardboard boxes (various sizes)
- Box cutter or scissors
- Non-toxic glue
- Paint (optional)
Instructions:
- Gather Boxes: Collect a few cardboard boxes in different sizes. Make sure they’re sturdy enough to support your cat’s weight.
- Cut and Connect: Use a box cutter to cut out doors and windows in each box. Arrange the boxes to create a multi-level structure and glue them together securely.
- Customize: If you want to get extra creative, you can paint the castle to make it look like a fairy tale fortress.
- Explore!: Place the castle in a cozy spot and let your cat explore their new kingdom.
Personal Anecdote: Building a cardboard castle for Whiskers was one of the most enjoyable projects I’ve ever done. He loves climbing and hiding in his new fortress, and it’s become his favorite spot to nap. It’s amazing how something as simple as cardboard can bring so much joy to a pet.
Tennis Ball Treat Dispenser
Materials Needed:
- Tennis ball
- Sharp knife
- Dog treats
Instructions:
- Cut the Ball: Carefully cut a small slit in the tennis ball. Make sure it’s big enough to fit some treats but not too large that they fall out easily.
- Fill with Treats: Put some of your dog’s favorite treats inside the tennis ball.
- Playtime: Give the ball to your dog and watch as they try to figure out how to get the treats out. It’s a great way to keep them mentally stimulated!
Personal Anecdote: Max loves his tennis ball treat dispenser. It’s his go-to toy when I’m busy and he needs something to keep him occupied. Plus, it’s a fun way for him to get his treats!
These DIY projects are not only fun and easy to make but also a fantastic way to bond with your pets. So, grab your supplies and get crafting! Your furry friends will thank you with lots of love and wagging tails. Happy crafting, everyone!